SAS Cloud Data Exchange(CDE) to Access Data from the On-Premises Server
- Introduction
- Access to Your Virtual Machine
- Instructions
- Part 1: Configure the Data Source Name(DSN) for On-Premises Data Sources
- Part 2: Access the On-Premises Data from the SAS Viya Application
Introduction
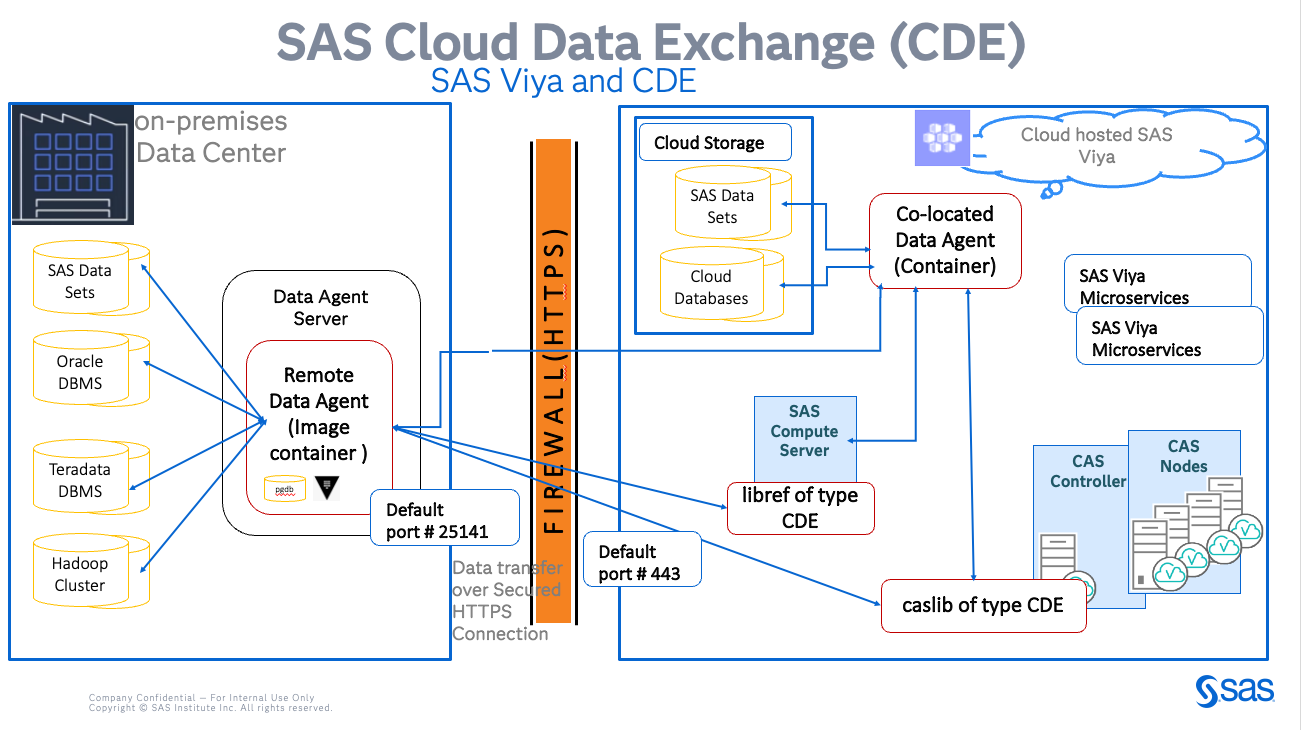
The SAS Cloud Data Exchange (CDE) for the SAS Viya platform is available with the 2023.03 release. The CDE enables the SAS users to connect to a database that can either be co-located on the SAS Viya platform or located at an on-premises data center. The CDE enables users to securely exchange the on-premises data from behind a firewall to the SAS Viya platform in the cloud. All data transfer/exchange occurs on secured standard-based communications along with sophisticated authentication and authorization. The on-premises data center requires a single port opened through the firewall to facilitate the data exchange.
The purpose of this hands-on is to access the on-premises data source from the SAS Viya applications hosted in a cloud environment.
Access to Your Virtual Machine
Follow the instructions given by your instructor to access the virtual machine.
Once connected to the virtual machine, you should see this:
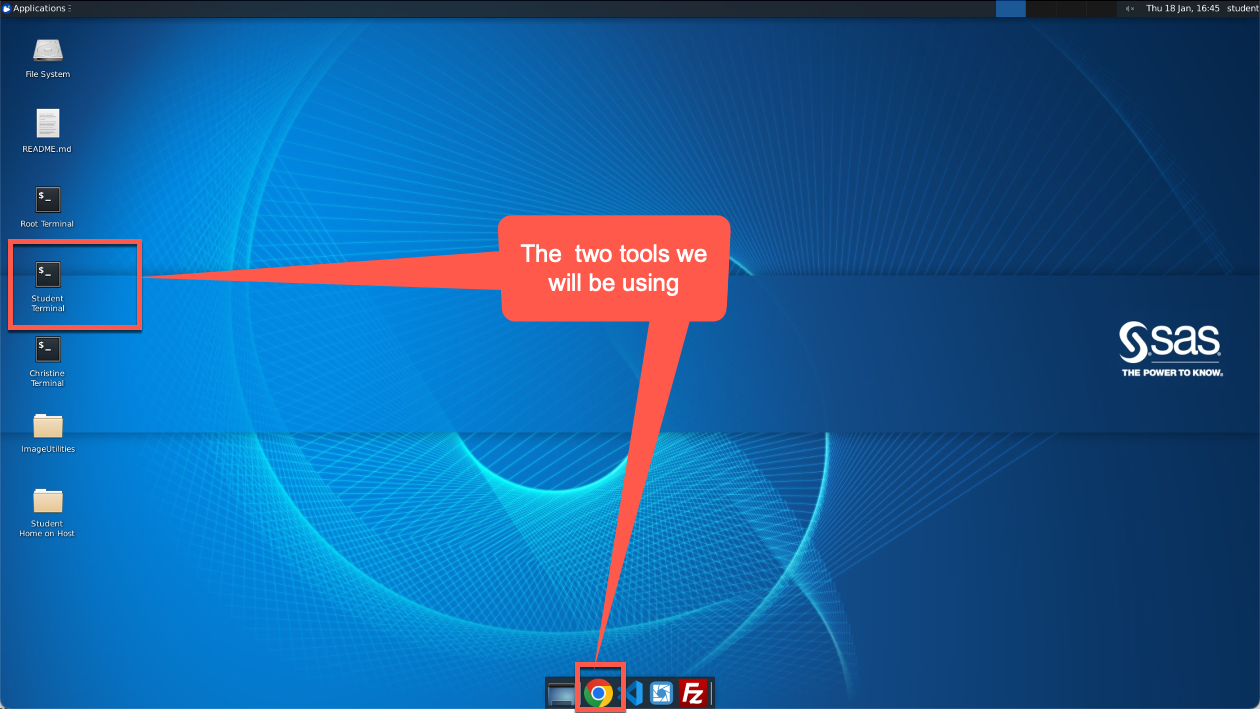
We will be using Google Chrome and Student Terminal.
Instructions
You can access the instructions from within the virtual machine so that it’s easier for you (especially copy/paste).
Open the Google Chrome browser (on the toolbar in the bottom middle of the desktop):

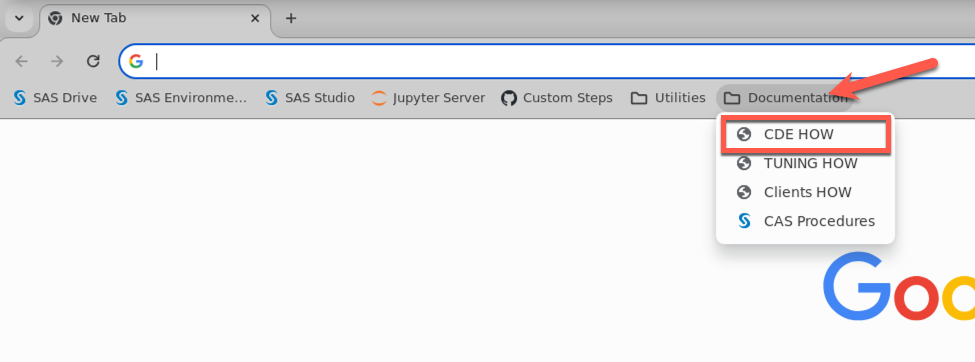
Open the CDE HOW from Documentation Folder bookmark:
Part 1: Configure the Data Source Name(DSN) for On-Premises Data Sources
Introduction
In this hands-on workshop, we will configure the data source name (DSN) at the SAS Remote Data Agent server hosted at the on-premises server. The SAS Remote Data Agent Server is part of the SAS Cloud Data Exchange software, and it runs on the on-premises Linux machine as a Docker container. We will access the Remote Data Agent to configure the DSN using the sas-viya CLI.
In this example, we will build an Oracle DSN and Base SAS data source at the SAS Remote Data Agent Server against an on-premises Oracle SID and Base SAS data sets location. We will access the on-premises Oracle database table and Base SAS table using a DSN configured at the SAS Remote Data Agent Server.
Create an Oracle Data Source Name (DSN) at Remote Data Agent Server
Create an Oracle Security Domain
We will create a security domain at the SAS Remote Data Agent Server to store the Oracle database user credential. To do this, we will run the sas-viya CLI statement on the Linux machine.
Click the Student Terminal icon located on the desktop:

You should obtain a Terminal window:
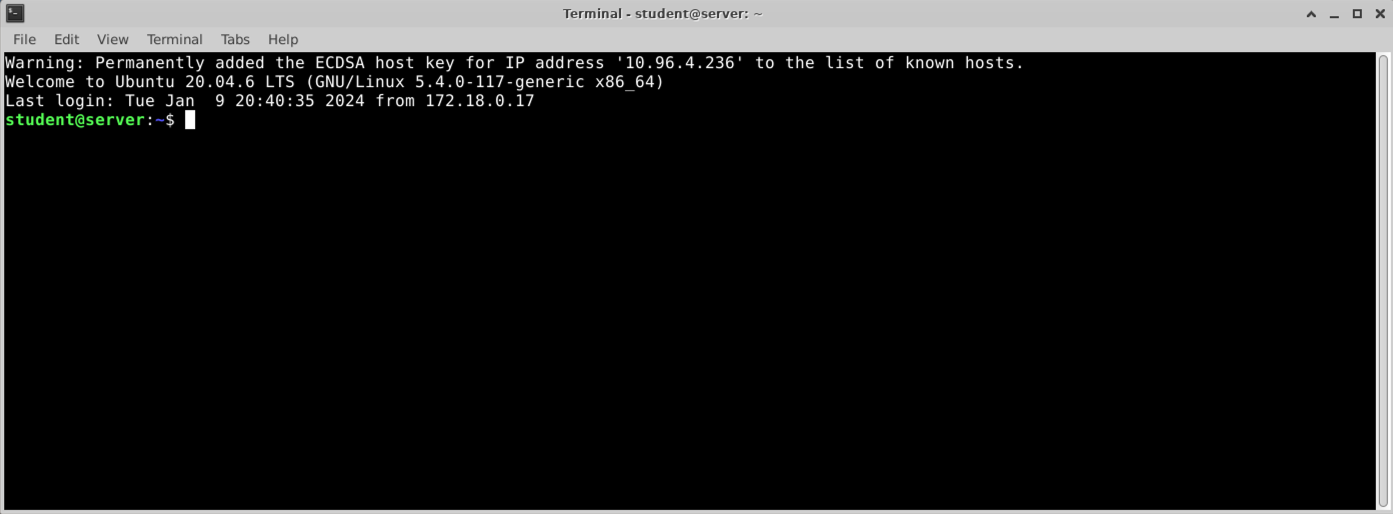
Copy the following command:
sas-viya dagentsrv servers set-default --data-agent sas-data-agent-server-remote

sas-viya dagentsrv security domains create --domain ORA_DOMAIN

sas-viya dagentsrv security domains list
Paste the command in the Student Terminal window by right-clicking and selecting Paste.
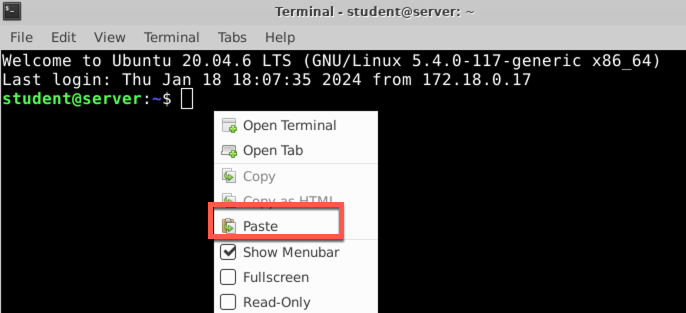
Run the command (type <Enter>).
You should see this:
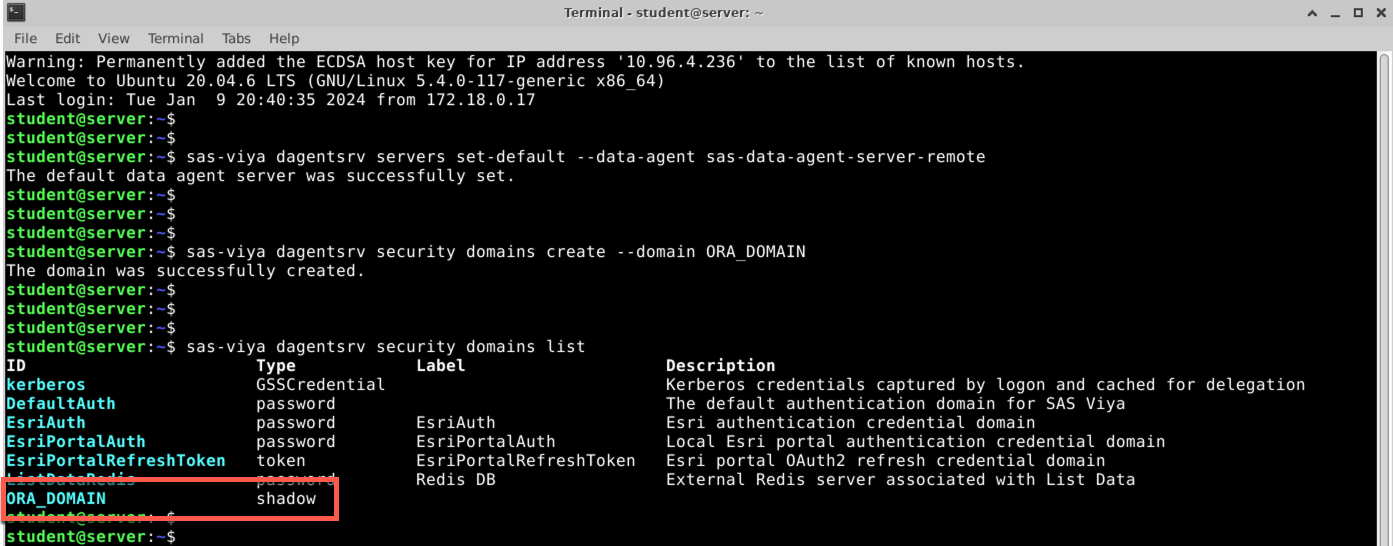
Log:
student@server:~$ sas-viya dagentsrv servers set-default --data-agent sas-data-agent-server-remote
The default data agent server was successfully set.
student@server:~$
student@server:~$
student@server:~$
student@server:~$ sas-viya dagentsrv security domains create --domain ORA_DOMAIN
The domain was successfully created.
student@server:~$
student@server:~$
student@server:~$
student@server:~$ sas-viya dagentsrv security domains list
ID                       Type            Label                    Description
kerberos                 GSSCredential                            Kerberos credentials captured by logon and cached for delegation
DefaultAuth              password                                 The default authentication domain for SAS Viya
EsriAuth                 password        EsriAuth                 Esri authentication credential domain
EsriPortalAuth           password        EsriPortalAuth           Local Esri portal authentication credential domain
EsriPortalRefreshToken   token           EsriPortalRefreshToken   Esri portal OAuth2 refresh credential domain
ListDataRedis            password        Redis DB                 External Redis server associated with List Data
ORA_DOMAIN               shadow
student@server:~$
student@server:~$
Add an user credential to the security domain
We will add a pair of the SAS Viya identity user and an Oracle user credential to the security domain at the SAS Remote Data Agent Server. To do this, we will run the following sas-viya CLI statement in the Student Terminal window.
In the following sas-viya cli statement, the value for --identity parameter is the SAS Viya identity user and the value for --username and --password parameters are the oracle user ID and password.
Copy the following command:
sas-viya dagentsrv security credentials create --domain ORA_DOMAIN --identity student --username STUDENT --password 'Metadata0'

sas-viya dagentsrv security credentials list --domain ORA_DOMAIN
Paste the command in the Student Terminal window by right-clicking and selecting Paste.
Run the command (type <Enter>).
You should see this:

Log:
student@server:~$
student@server:~$ sas-viya dagentsrv security credentials create --domain ORA_DOMAIN --identity student --username STUDENT --password 'Metadata0'
The credential was successfully created.
student@server:~$
student@server:~$
student@server:~$
student@server:~$ sas-viya dagentsrv security credentials list --domain ORA_DOMAIN
Identity   Type   UserId
student    user   STUDENT
student@server:~$
Create an Oracle Data Source Name (DSN)
We will create an Oracle data source name (DSN) at the SAS Remote Data Agent Server with the Oracle security domain. The DNS with security domain will allow only valid users in the security domain to access the Oracle database table. To do this, we will run the following sas-viya CLI statement in the Student Terminal window.
Copy the following command:
RDA_HOST=server.demo.sas.com
echo $RDA_HOST

sas-viya dagentsrv data-services create oracle --name ora_server --path "//${RDA_HOST}:1521/ORCL" --domain ORA_DOMAIN

sas-viya dagentsrv services list
Paste the command in the Student Terminal window by right-clicking and selecting Paste.
Run the command (type <Enter>).
You should see this:

Log:
student@server:~$
student@server:~$ RDA_HOST=server.demo.sas.com
student@server:~$
student@server:~$ echo $RDA_HOST
server.demo.sas.com
student@server:~$
student@server:~$ sas-viya dagentsrv data-services create oracle --name ora_server --path "//${RDA_HOST}:1521/ORCL" --domain ORA_DOMAIN
The data service was successfully created.
student@server:~$
student@server:~$
student@server:~$
student@server:~$ sas-viya dagentsrv services list
Name         Type     Domain       Version   Options
BASE         base     ---          2.5       ---
__SERVER__   server   ---          2.5       PURGE_CACHE=30;CASE_SENSITIVITY=(OBJECT=F;COLUMN=F);CACHE=(NAME=AS;TIMEOUT=300)
ora_server   oracle   ORA_DOMAIN   2.5       CONOPTS=(DRIVER=ORACLE;PATH=//server.demo.sas.com:1521/ORCL);
                                             CASE_SENSITIVITY=(OBJECT=T;COLUMN=T)
student@server:~$
student@server:~$
Test the Oracle Data Source Name (DSN)
We will test the Oracle data source name (DSN) created in the previous step at the SAS Remote Data Agent Server. We will verify the Oracle database access using sas-viya CLI. To do this, we will run the following sas-viya CLI statement on the Linux machine in the Student Terminal window.
Copy the following command:
sas-viya dagentsrv data-sources test --name ora_server
Paste the command in the Student Terminal window by right-clicking and selecting Paste.
Run the command (type <Enter>).
You should see this:

When executing the sas-viya CLI, behind the scenes, an Oracle user ID/password STUDENT/Metadata0 is logged in to the oracle database with the SAS Viya identity user ‘student’. The pair of the SAS Viya identity user and the Oracle user credentials is stored in the Oracle security domain at the Remote Data Agent Server. In the Student Terminal, the SAS Viya user ‘student’ is authenticated for sas-viya CLI.
Log:
student@server:~$
student@server:~$ sas-viya dagentsrv  data-sources test --name ora_server
Successfully connected to data source ora_server.
student@server:~$
List the Oracle tables using DSN
We will list the Oracle database table using the DSN created in the previous step at the SAS Remote Data Agent Server. To do this, we will run the following sas-viya CLI statement on the Linux machine in the Student Terminal window.
Copy the following command:
sas-viya dagentsrv data-sources tables list --data-source ora_server --catalog ORA_SERVER --schema STUDENT
Paste the command in the Student Terminal window by right-clicking and selecting Paste.
Run the command (type <Enter>).
You should see this:

Log:
student@server:~$
student@server:~$ sas-viya dagentsrv data-sources tables list --data-source ora_server --catalog ORA_SERVER --schema STUDENT
Name         Type    Native Catalog
TEST_TABLE   TABLE   NULL
student@server:~$
Query data from the Oracle table using DSN
We will query the Oracle database table to fetch few rows using the DSN created in the previous step at the SAS Remote Data Agent Server. To do this, we will run the following sas-viya CLI statement on the Linux machine in the Student Terminal window.
Copy the following command:
sas-viya dagentsrv sql --sql "select * from STUDENT.TEST_TABLE where id < 10 " --dsn ora_server
Paste the command in the Student Terminal window by right-clicking and selecting Paste.
Run the command (type <Enter>).
You should see this:

Log:
student@server:~$ sas-viya dagentsrv sql --sql "select * from STUDENT.TEST_TABLE  where id < 10 " --dsn ora_server
DATE_VALUE   ID   TEXT_VALUE
==========   ==   ==========
             1    tBBrPrPAWDrtjiuXTTzS
             2    xUXUIFsonyZybwPJRhqD
             3    xPtEKebjHZIZMlxKrduT
             4    NnjlZWdpPoWmwvmlWPVB
             5    dWkFcmdERkVOzAikueLj
             6    DGHqFGRmKIdRLCuGDWQU
             7    wBATOjPZlCIlcLPZXHuX
             8    ZiaEekWlNLgTNcDsYCtI
             9    dGpZwhJdgVKpcSvJCHso
student@server:~$
student@server:~$
Create a Base SAS Data Source Name (DSN) at the Remote Data Agent Server
Create a Base SAS Catalog
We will create a logical Base SAS catalog at the Remote Data Agent Server to store the schema for the SAS datasets (SAS7BDAT file). To do this, we will run the sas-viya CLI statement on the Linux machine.
Click the Student Terminal icon located on the desktop:

You should obtain a Terminal window:

Copy the following command:
sas-viya dagentsrv servers set-default --data-agent sas-data-agent-server-remote ;

sas-viya dagentsrv catalogs create base --name BASE_CATALOG ;

sas-viya dagentsrv catalogs  list ;
Paste the command in the Student Terminal window by right-clicking and selecting Paste.

Run the command (type <Enter>).
You should see this:

Log:
student@server:~$ sas-viya dagentsrv servers set-default --data-agent sas-data-agent-server-remote ;
The default data agent server was successfully set.
student@server:~$
student@server:~$ sas-viya dagentsrv catalogs create base --name BASE_CATALOG ;
The catalog was successfully created.
student@server:~$
student@server:~$
student@server:~$ sas-viya dagentsrv catalogs  list ;
Name           Service      Native Catalog   Options
BASE_CATALOG   BASE
ORA_SERVER     ora_server
student@server:~$
Create a Base SAS schema under Base SAS Catalog
We will create a logical Base SAS schema under the logical Base SAS catalog at the Remote Data Agent Server to read the SAS datasets (SAS7BDAT file). To do this, we will run the following sas-viya CLI statement on the Linux machine in the Student Terminal window.
The parameter --primary-path points to the location where the SAS7BDAT files are located and available from the Remote Data Agent Docker container. When the Remote Data Agent Docker container started the parameter --mount /opt/gelcontent/data:/gelcontent/data was used to mount the data file location.
Copy the following command:
sas-viya dagentsrv schemas create base --catalog BASE_CATALOG  --name BASE_SCHEMA --primary-path /gelcontent/data/cde ;

sas-viya dagentsrv  schemas list ;
Paste the command in the Student Terminal window by right-clicking and selecting Paste.
Run the command (type <Enter>).
You should see this:

Log:
student@server:~$
student@server:~$ sas-viya dagentsrv schemas create base --catalog BASE_CATALOG  --name BASE_SCHEMA --primary-path /gelcontent/data/cde ;
The schema was successfully created.
student@server:~$
student@server:~$
student@server:~$
student@server:~$ sas-viya dagentsrv  schemas list ;
Name          Catalog        Options
BASE_SCHEMA   BASE_CATALOG   PRIMARYPATH=/gelcontent/data/cde
student@server:~$
Test the Base SAS Data Source Name (DSN)
We will test the Base SAS data source name (DSN) created in the previous step at the SAS Remote Data Agent Server. To do this, we will run the following sas-viya CLI statement on the Linux machine in the Student Terminal window.
Copy the following command:
sas-viya dagentsrv data-sources test --name BASE
Paste the command in the Student Terminal window by right-clicking and selecting Paste.
Run the command (type <Enter>).
You should see this:

Log:
student@server:~$
student@server:~$ sas-viya dagentsrv  data-sources test --name BASE
Successfully connected to data source BASE.
student@server:~$
List the Base SAS Datasets tables using DSN
We will list the SAS data sets table using the DSN, logical catalog, and logical schema created in the previous step at the SAS Remote Data Agent Server. To do this, we will run the following sas-viya CLI statement on the Linux machine in the Student Terminal window.
Copy the following command:
sas-viya dagentsrv data-sources tables list --data-source BASE --catalog BASE_CATALOG --schema BASE_SCHEMA
Paste the command in the Student Terminal window by right-clicking and selecting Paste.
Run the command (type <Enter>).
You should see this:

Log:
student@server:~$
student@server:~$ sas-viya dagentsrv data-sources tables list --data-source BASE --catalog BASE_CATALOG --schema BASE_SCHEMA
Name             Type    Native Catalog
PRDSALE_CANADA   TABLE   BASE_CATALOG
PRDSALE_USA      TABLE   BASE_CATALOG
student@server:~$
Query data from the Base SAS datasets table using DSN
We will query the Base SAS data sets table using the DSN, logical catalog, and logical schema created in previous step at the SAS Remote Data Agent Server. To do this, we will run the following sas-viya CLI statement on the Linux machine in the Student Terminal window.
Copy the following command:
sas-viya dagentsrv sql --sql "select * from BASE_CATALOG.BASE_SCHEMA.PRDSALE_USA" --dsn BASE | more
Paste the command in the Student Terminal window by right-clicking and selecting Paste.
Run the command (type <Enter>).
You should see this:

To exit the more command type q to return to the $ prompt.
Log:
student@server:~$ sas-viya dagentsrv sql --sql "select * from BASE_CATALOG.BASE_SCHEMA.PRDSALE_USA" --dsn BASE | more
01JAN1993   1   14     1404   1993   EAST   EDUCATION   FURNITURE   SOFA   USA
=========   =   ==     ====   ====   ====   =========   =========   ====   ===
12085       1   1079   1474   1993   EAST   EDUCATION   FURNITURE   SOFA   USA
12113       1   1332   1100   1993   EAST   EDUCATION   FURNITURE   SOFA   USA
12144       2   911    937    1993   EAST   EDUCATION   FURNITURE   SOFA   USA
12174       2   1122   1501   1993   EAST   EDUCATION   FURNITURE   SOFA   USA
....
.......
...............
student@server:~$
student@server:~$
Part 2: Access the On-Premises Data from the SAS Viya Application
Introduction
In this part, we will access the on-premises data (Oracle, and Base SAS data sets tables) from the SAS Viya applications using the data source name (DSN) configured at the SAS Remote Data Agent Server.
This part is dependent on the previous part, and the DSN must be defined and configured at the SAS Remote Data Agent Server.
Sign In to SAS Studio
In the Google Chrome browser, add a tab and click the SAS Studio bookmark (or go to https://server.demo.sas.com/SASStudio/):

Sign in using student/Metadata0 and click “Sign in”:
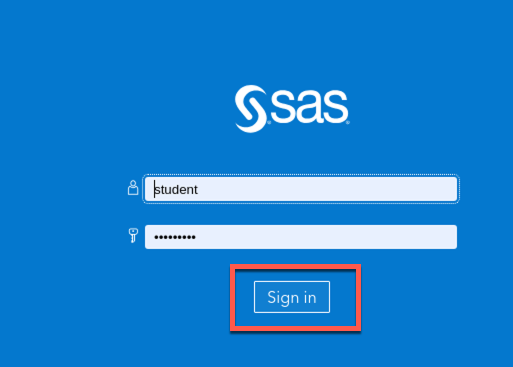
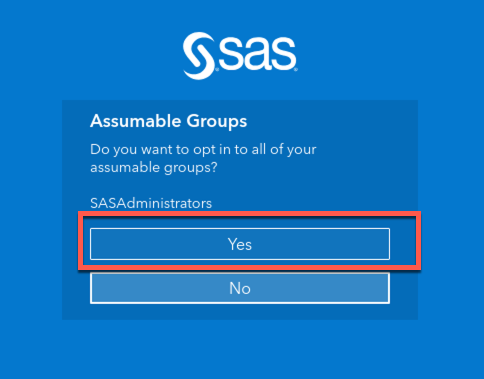
Opt in for administrative rights:
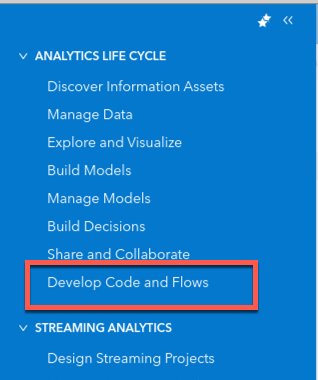
If you are not in the SAS Studio application, you can access it by clicking Develop Code and Flows:
Access On-Premises Oracle Data from the SAS Viya Application
Access On-Premises Oracle Data from the SAS Compute Server
In a new SAS program, copy, paste, and run the following code step-by-step and observe the results.
Please use <Ctrl+V> in SAS Studio editor to paste the copied SAS code.
LIBNAME cdeora cde dataagentname="sas-data-agent-server-remote"
dsn=ora_server preserve_tab_names=yes;

data cdeora.comet ;
set sashelp.comet ;
run;
quit;

Proc SQL outobs=20;
select * from cdeora.comet ;
run;quit;
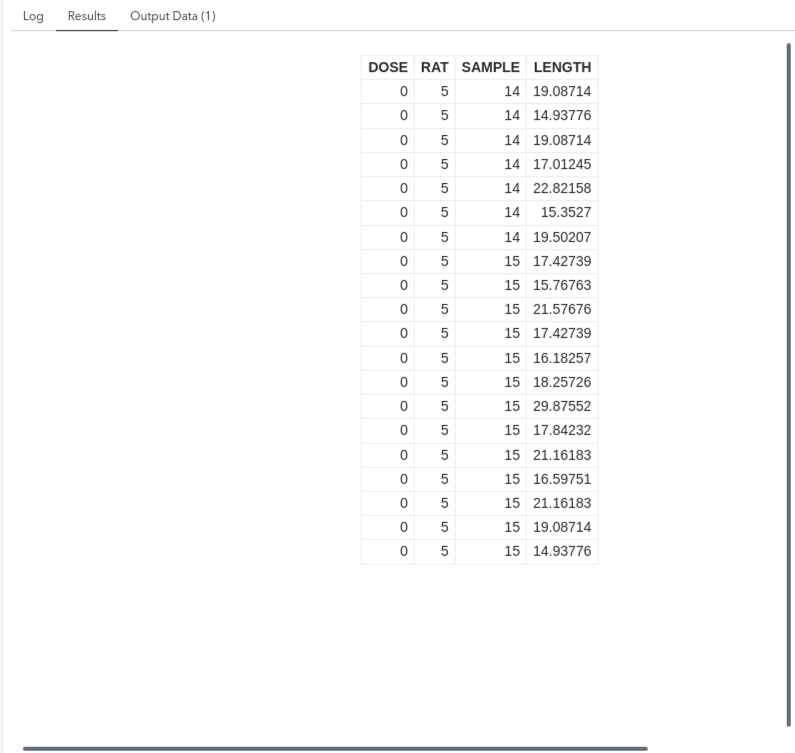
On the Results tab, you should see the data from an Oracle table. You might see a different value for displayed records than in the screenshot.
Access On-Premises Oracle Data from CAS
Set Up a CDE Caslib
In a new SAS program, copy, paste, and run the following code step-by-step and observe the results.
cas _all_ terminate ;

cas mysession sessopts=(metrics=true messagelevel=all) ;

/* Drop CASLIB if exists */
proc cas ;
   dropcaslib / caslib="cdeora" quiet=true ;
quit ;

/* Create a CASLIB with CDE Oracle DSN */
caslib cdeora datasource=(
      srctype="clouddex",
      dataAgentName="sas-data-agent-server-remote",
      catalog="ORA_SERVER",
      schema="STUDENT",
      conopts="dsn=ora_server"
) libref=cdeora global;

/* List existing tables from On-premises Oracle database */
proc casutil incaslib="cdeora";
   list files ;
quit;
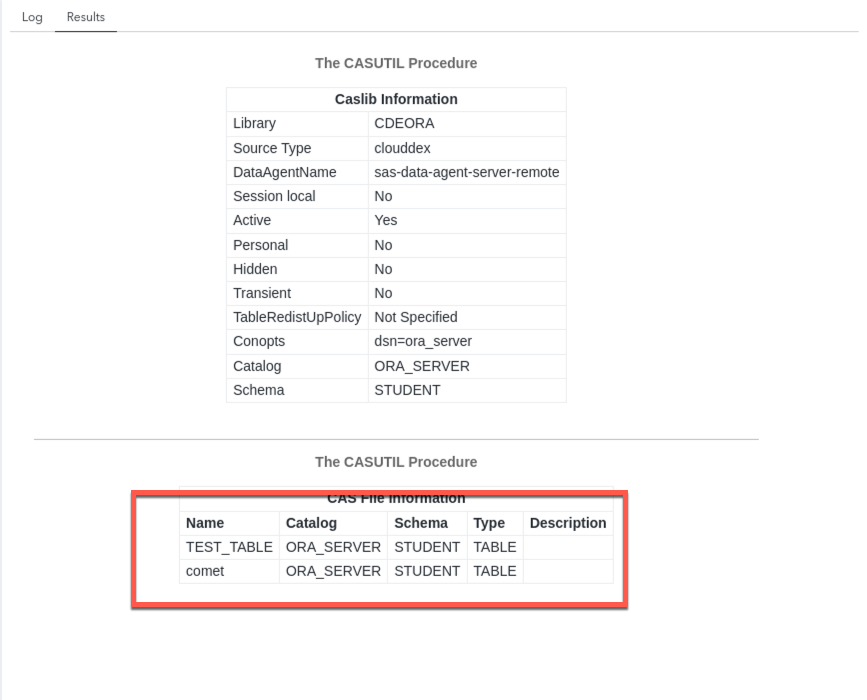
On the Results tab, you should see the list of Oracle tables.
CAS load/save from the On-Premises Oracle Database
In the same SAS program, copy, paste, and run the following code step-by-step and observe the results:
/* Load an On-premises Oracle table into CAS */
proc casutil incaslib="cdeora" outcaslib="cdeora" ;
   droptable casdata="TEST_TABLE" quiet ;
   load casdata="TEST_TABLE" casout="TEST_TABLE"  promote ;
quit ;

/* List "loaded" CAS tables */
proc casutil incaslib="cdeora" ;
   list tables ;
quit ;
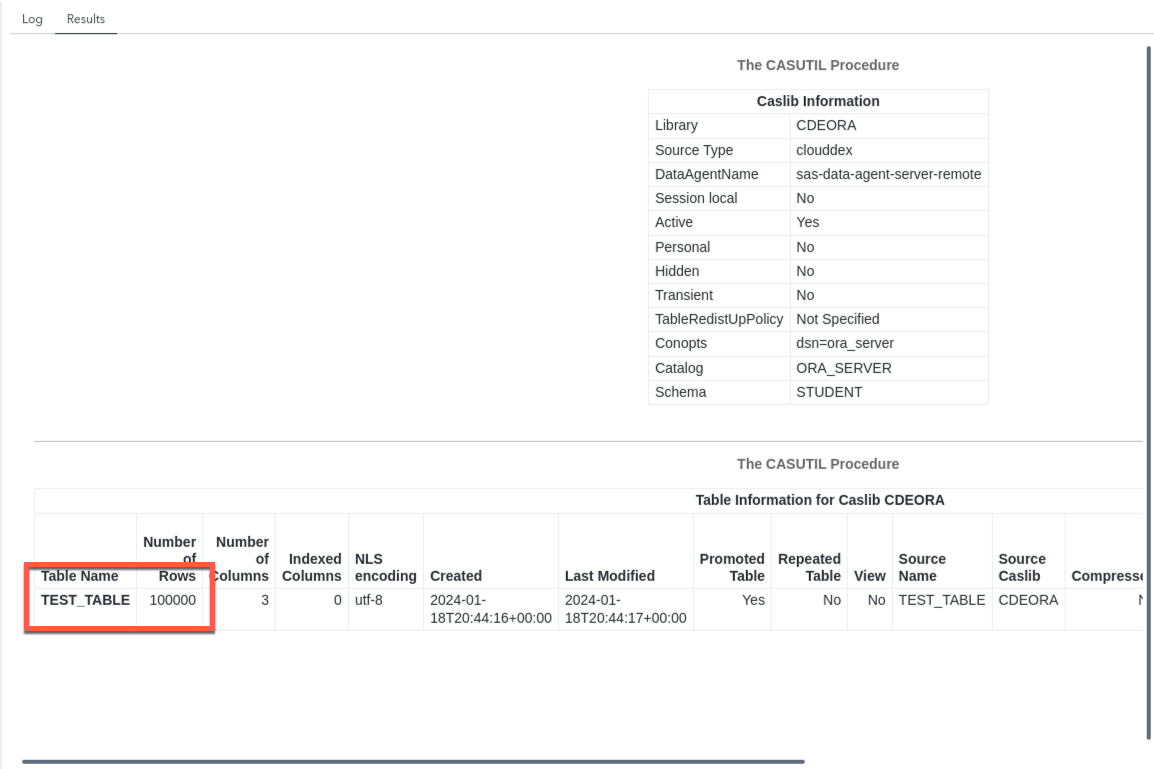
On the Results tab, you should see the Oracle table loaded in CAS.
In the same SAS program, copy, paste, and run the following code step-by-step and observe the results:
/* Save a CAS table to On-premises Oracle database */
proc casutil incaslib="cdeora" outcaslib="cdeora" ;
   droptable casdata="heart" quiet ;
   load data=sashelp.heart casout="heart" ;
   save casdata="heart" casout="heart" replace ;
quit ;


/* List existing tables from On-premises Oracle database */
proc casutil incaslib="cdeora";
   list files ;
quit;
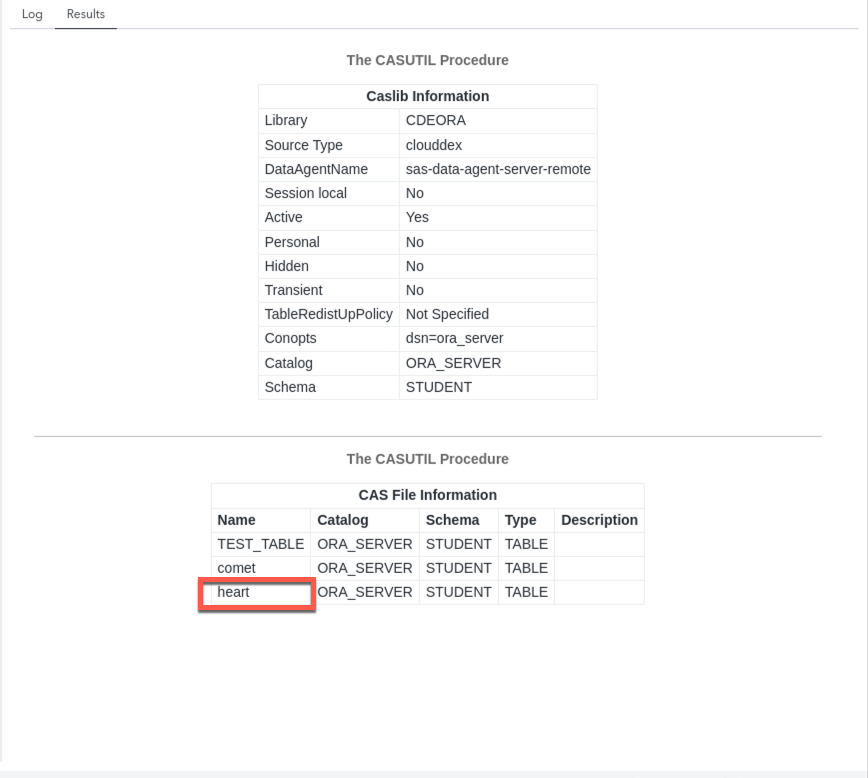
On the Results tab, you should see the CAS table saved to an Oracle database.
Access the On-Premises Base SAS Data Sets from the SAS Viya application
Access the On-Premises Base SAS Data Sets from the SAS Compute Server
In a new SAS program, copy, paste, and run the following code step-by-step and observe the results:
LIBNAME cdelib cde dataagentname="sas-data-agent-server-remote"
dsn=BASE
catalog=BASE_CATALOG
schema=BASE_SCHEMA
preserve_tab_names=yes;

data cdelib.sas_currency ;
set sashelp.sas_currency ;
run;

Proc SQL outobs=20;
select * from cdelib.sas_currency ;
run;quit;
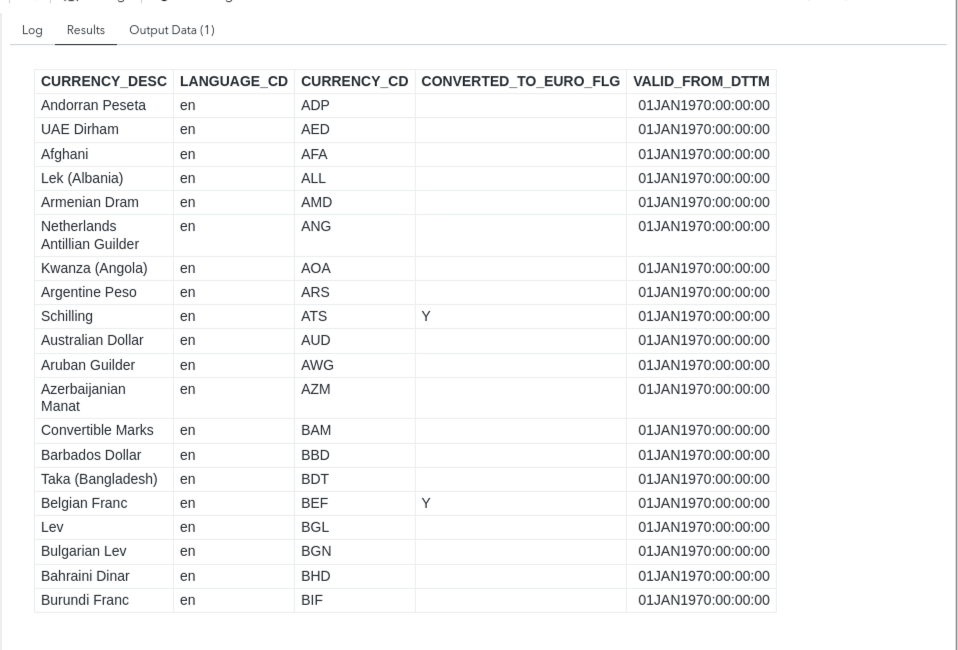
On the Results tab, you should see the data from a Base SAS data sets table.
Access the On-Premises Base SAS Data Sets table from the CAS
Set Up a CDE Caslib
In a new SAS program, copy, paste, and run the following code step-by-step and observe the results:
cas _all_ terminate ;

cas mysession sessopts=(metrics=true messagelevel=all) ;

/* Drop CASLIB if exists */
proc cas ;
   dropcaslib / caslib="cdebase" quiet=true ;
quit ;

/* Create a CASLIB with CDE Base SAS DSN */
caslib cdebase datasource=(
      srctype="clouddex",
      dataAgentName="sas-data-agent-server-remote",
      catalog="BASE_CATALOG",
      schema="BASE_SCHEMA",
      conopts="dsn=BASE"
) libref=cdebase global;

/* List existing tables from On-premises Base SAS datasets location */
proc casutil incaslib="cdebase";
   list files ;
quit;
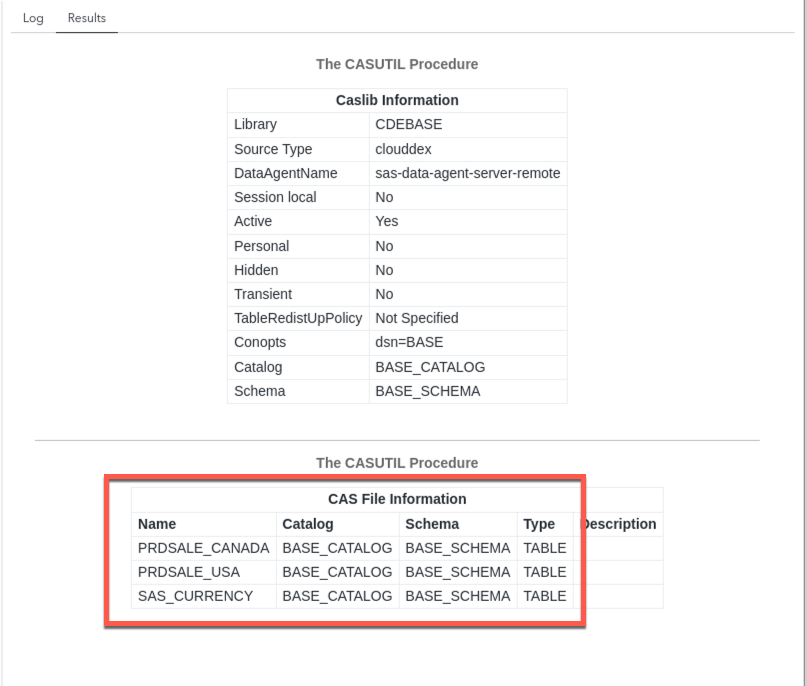
On the Results tab, you should see the list of Base SAS data sets tables.
CAS Load/Save from the Base SAS Data Sets Table
In the same SAS program, copy, paste, and run the following code step-by-step and observe the results:
/* Load an On-premises Base SAS Datasets table into CAS */
proc casutil incaslib="cdebase" outcaslib="cdebase" ;
   droptable casdata="PRDSALE_USA" quiet ;
  load casdata="PRDSALE_USA" casout="PRDSALE_USA" promote ;
quit ;

/* List 'loaded' CAS tables */
proc casutil incaslib="cdebase" ;
   list tables ;
quit ;
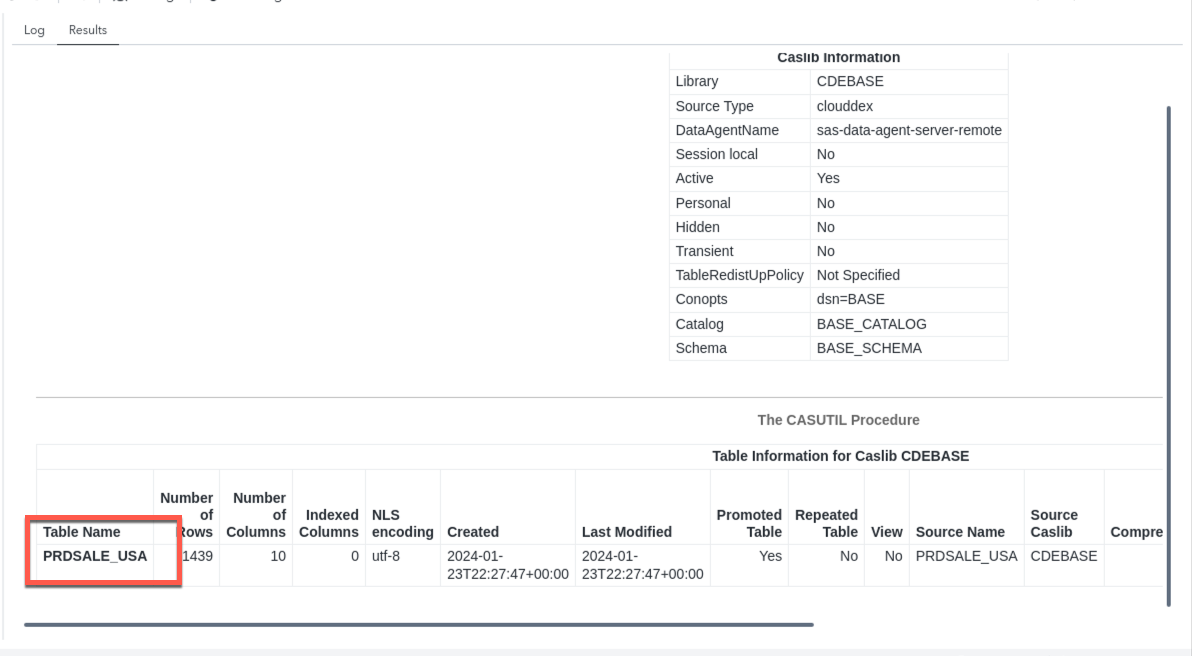
On the Results tab, you should see the Base SAS table loaded into CAS.
In the same SAS program, copy, paste, and run the following code step-by-step and observe the results:
/* Save a CAS table to On-premises Base SAS Datasets table */
proc casutil incaslib="cdebase" outcaslib="cdebase" ;
   droptable casdata="stocks" quiet ;
   load data=sashelp.heart casout="stocks" ;
   save casdata="stocks" casout="stocks" replace ;
quit ;

/* List existing tables from On-premises Base SAS Datasets location */
proc casutil incaslib="cdebase";
   list files ;
quit;
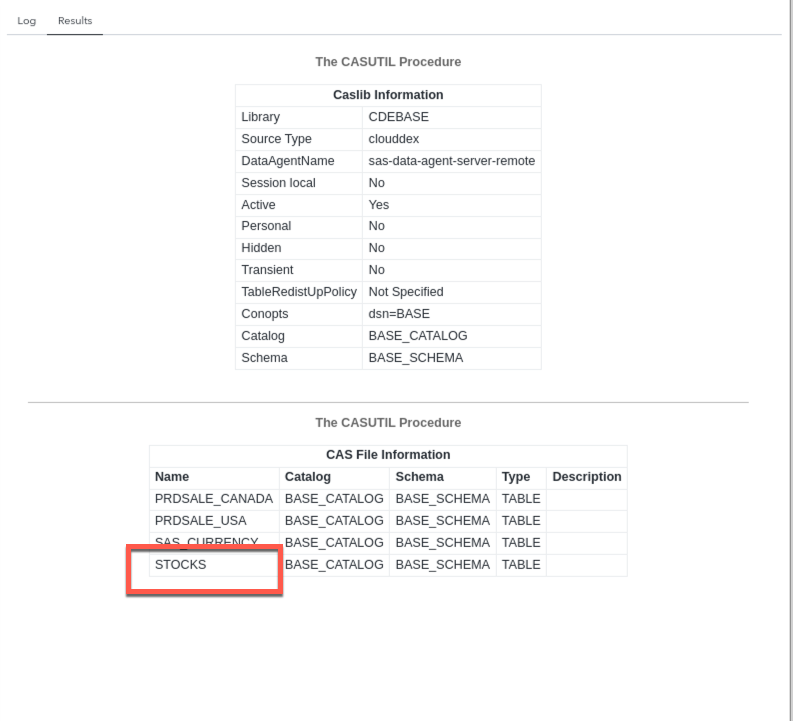
On the Results tab, you should see the CAS table saved to Base SAS data sets location.
